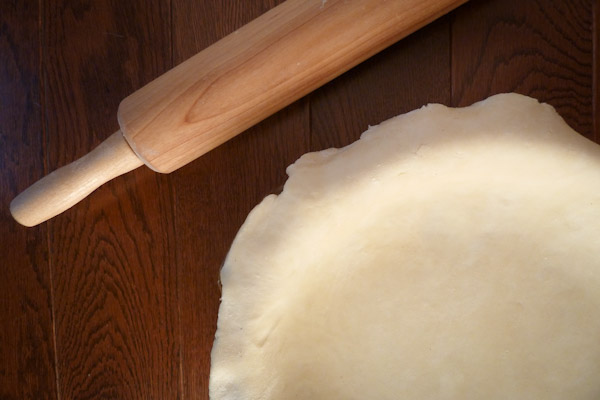
The Flakiest Most Tender Pie Crust
/I know I promised chai tea lattes, but do to complications of a broken milk frother, that will have to wait for another day.
So instead I've got a double shot for you. I'm going to share two recipes;
1. The best pastry dough you've ever rolled out! and...
2. A classic deep dish apple pie.
This comes on the heels of Thanksgiving of course, so everything you see is clearly indulgent. I just thought I'd put that out there.
Now I am going to do this in two parts mainly because I've found that there aren't many sites that give a detailed explanation on how to make a good pie pastry (accept for the pioneer woman of course). So today I'll show you how to make the pie dough and in my next post I'll give you my recipe for a huge classic apple pie.
If you have ever been anxious about making pastry (let's face it, it's not always an easy feat), then this is the pastry dough for you. It's flaky, it's tender and it rolls out like a dream come true. There's no cracking or crumbling when rolling this pastry out. It turns out perfect every time. It also makes a lot of dough, which freezes well.
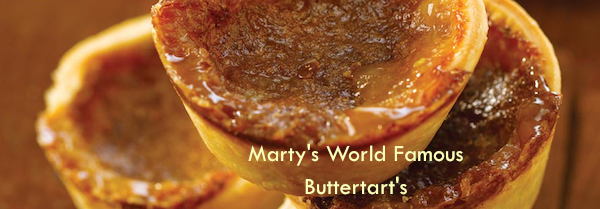
This is actually the pastry that Marty's World Famous Coffee House in Bracebridge Ontario uses. If you've ever been there then you know that they're famous for their giant buttertart's and pies. They even come with a warning on the box: "Do not drive and eat these tarts; you will wear them". It's a very old recipe, literally a century old, that was used by La congregation des Soeurs grises (The Grey Nuns) in Quebec, that was passed down through Marty's family. I realize some of you don't know what buttertart's are so here is a picture.
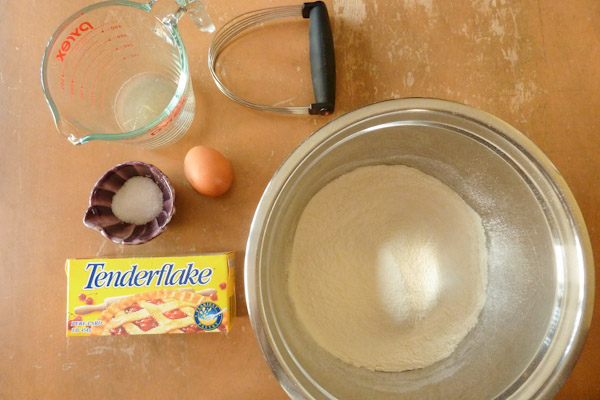
Getting back to the pie dough, here is the starting lineup of players:
Before you get started I'm going to give you a few tips for making perfect pastry:
- Always use a chilled stainless steel bowl.
- Chill the Tenderflake/Crisco for an hour before using.
- Don't over-cut the lard into the flour; it should be loose and light.
- Whip the egg white in a clean, steel bowl. Any residue from the lard will reduce fluffiness.
- Ice-cold water is important to use.
- Wrap and chill the dough in the fridge for 1 hour before rolling out.
Century-Old Nun's Pastry Dough (makes 1 "head" of dough: 3 pie crusts)
Print, Email, or Text this recipe
Ingredients:
- 4 cups of unbleached all-purpose flour
- 1 Tbsp sea salt
- Juice of 1/2 lemon
- 1lb Tenderflake (lard or shortening)
- 1 egg, separated
Directions:
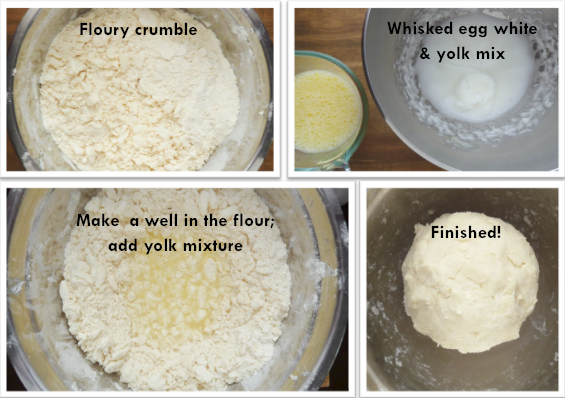
- Sift the flour into a large chilled stainless steel bowl. Whisk in the salt. Cut the lard into small cubes and add to the flour. Using a pastry cutter work the lard into the flour until the mix resembles a course, floury crumble.
- Separate the egg white into a bowl for whisking (if you have a mixer fitted with a whisk; all the better) and the yolk into a measuring jug. Add the lemon juice to the egg yolk and top with ice cold water to the 1-cup line, and stir well.
- Whisk the egg white until foamy and white. About 2-3 minutes on high-speed if using a stand mixer.
- Using your hands, make a well in the middle of the flour mixture. Add the egg yolk mixture to the flour mix and gently fold together with your fingertips from the outer edges in just until it starts to come together. While the mix is still a bit floury, add the whipped egg white and gently press and fold the dough from outside to inside, until all the flour comes together into a paste-like ball.
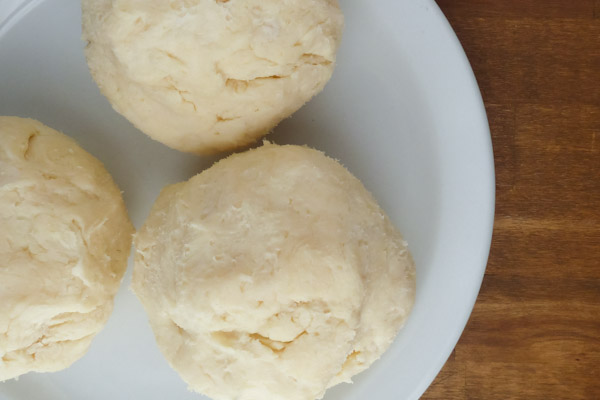
- Divide the dough into 3 separate balls then wrap in plastic wrap and chill for at least an hour before using.
If you'd like a visual demonstration of how to make this pastry check out this video. And don't forget to come back Monday for a classic apple pie recipe!
I think it's time a for green smoothie now.