Pumpkin Pie Spice Latte (vegan)

Meet one of my favourite fall drinks.

Vegan Pumpkin Pie Spice Latte | ediblesoundbites.com #vegan #fall #thanksgiving

I can't even tell you how easy it is to make your own pumpkin spice latte at home. Wait a sec...why don't I show you how?!

It's time to pop open a can of pumpkin and put some coffee/espresso on.

Vegan Pumpkin Pie Spice Latte | ediblesoundbites.com #vegan #fall #thanksgiving

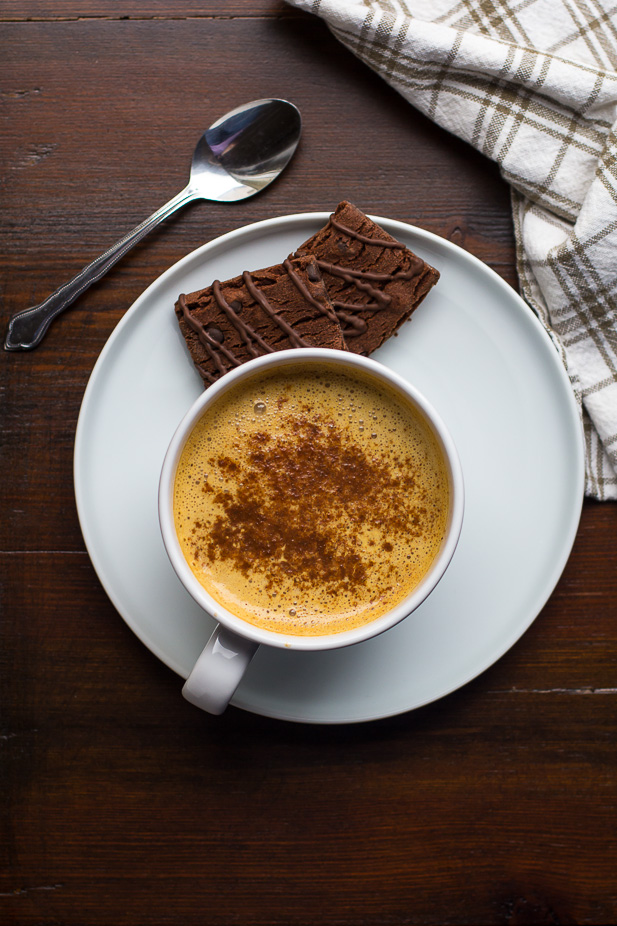
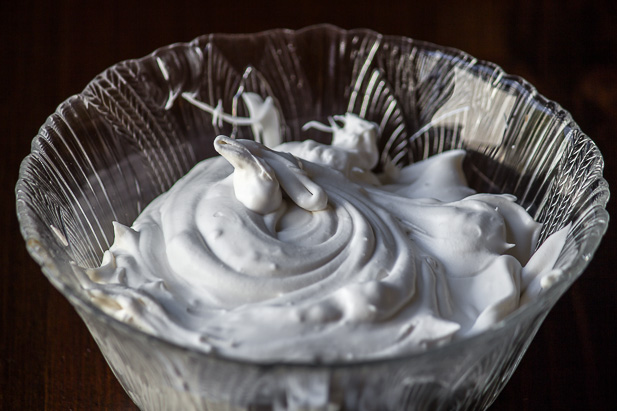
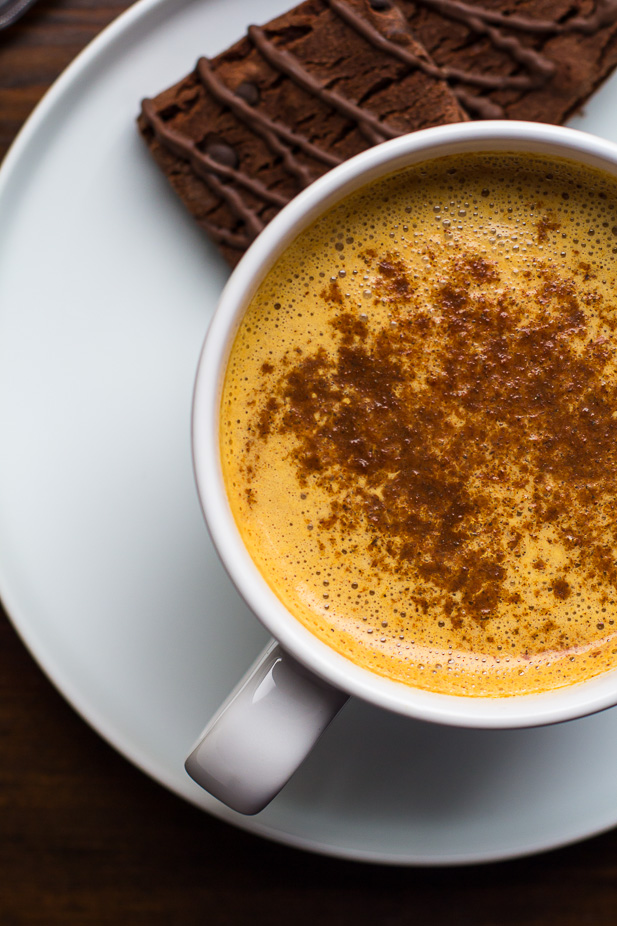
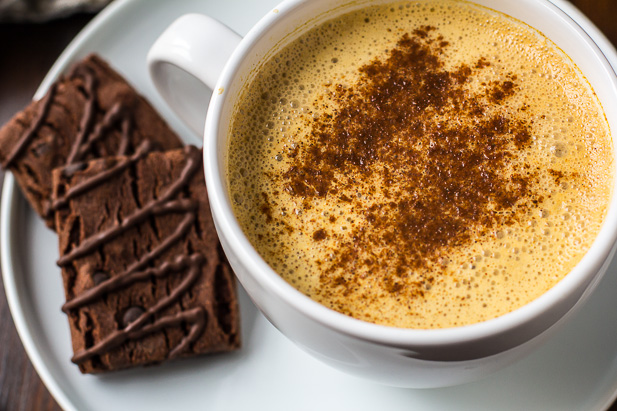
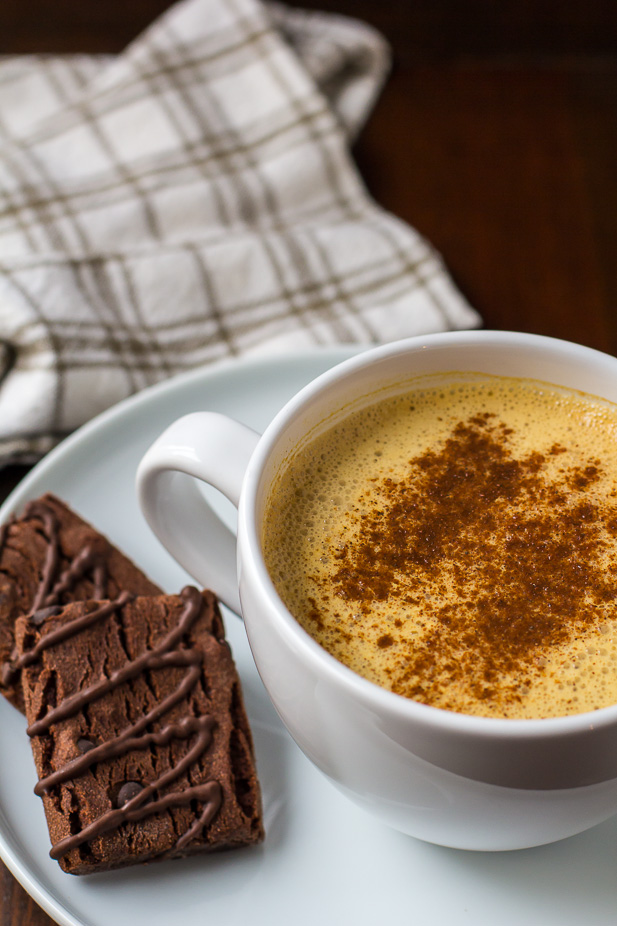
First grab a pot and warm some milk. Stir in your pumpkin puree, spices, and maple syrup to taste (or maple butter <-- This stuff is pure gold!). Give it a quick whiz in your blender to make it nice and foamy. Now pour your coffee or espresso into your favourite mug and add the sweetened pumpkin milk. And voila, you'll have yourself a wicked pumpkin spice latte in no time. Don't forget to add a touch of coconut whipped cream and a few shakes of cinnamon and nutmeg. If you'd like to make your own coconut milk whipped cream, check out this post.

Vegan Pumpkin Pie Spice Latte | ediblesoundbites.com #vegan #fall #thanksgiving

Now you can skip the line at Starbucks and save a few bucks. What I love the most about this pumpkin spice latte is that it's made using real pumpkin, fresh spices, and pure maple syrup, making it the perfect clean eating treat. And it's just as good as the one's you buy at the coffee shop. Can you believe that in just one Tall 12oz pumpkin spice latte from Starbucks there is 38 grams of sugar? Neither can I. And that's just the smallest size! Making this latte at home will cut way back on all that sugar without skimping on the taste.

I can get behind that, can you?

Vegan Pumpkin Pie Spice Latte | ediblesoundbites.com #vegan #fall #thanksgiving

Totally nutritious and free of refined sugar.

Bonus points for making this latte vegan.

Vegan Pumpkin Pie Spice Latte | ediblesoundbites.com #vegan #fall #thanksgiving

You'll be feeling cozy in no time.

Happy Fall!!!


Pumpkin Spice Latte
Vegan Pumpkin Pie Spice Latte | ediblesoundbites.com #vegan #fall #thanksgiving

by Jennifer Trennum

Prep Time: 5-10 minutes

Keywords: blender how-to beverage vegan vegetarian gluten-free grain-free maple syrup pumpkin coffee latte fall


Ingredients (Serves 1)

  • 1-2 shots espresso, or 2-4oz (1/4 cup) strongly brewed coffee
  • 1 cup/ 8oz unsweetened almond milk, or milk of choice
  • 1 heaping tablespoon pumpkin puree
  • 2 tsp pure maple syrup, or maple butter (or to taste)
  • 1/2 teaspoon pumpkin pie spice, plus more for garnish
  • coconut whipped cream

Instructions

While coffee is brewing, place milk in a small pot over medium heat. Whisk frequently until it starts to simmer then reduce heat to med-low, add in pumpkin, maple syrup, and pumpkin pie spice and whisk.

Pour hot milk/pumpkin mixture into blender and blend until frothy. Pour the coffee into a large mug and then pour in the sweetened pumpkin milk. Finish with coconut whipped cream and a sprinkle of pumpkin pie spice if desired.
* Note

You may substitute almond milk with any milk you'd like.
Nutritional Analysis

Nutrients per 1 serving, without coconut whipped cream: 122 calories, Total Fat: 3g, Cholesterol: 0mg, Sodium: 160mg, Carbohydrates: 23g, Fiber: 8g, Sugar: 13g, Protein: 4g, Potassium: 72 mg, Vit A: 443 % DV, Vit B-12: 50% DV, Vit D: 45% DV, Calcium: 34.6 % DV


Powered by Recipage


Coconut Whipped Cream Photo Tutorial

Check out my new obsession. Coconut Whipped Cream! I've know about this for a while now, but recently I started thinking to myself, "why don't I have a step-by-step recipe on my blog?" I know that whipped coconut cream isn't new to many of you. It's been around for some time, and there are a lot of great one's out there, but I wanted to tackle one of my own

Coconut Whipped Cream-11.jpg

If you haven't made coconut whipped cream before, then now is the time. Just think of that pumpkin pie to come on Thanksgiving. It's vegan, It's dairy free (so there are no ugly consiquence's for those who are lactose intolerant), it's gluten free, and it's to die for! Especially if you love coconut. What more could one ask for?

Coconut Whipped Cream Photo Tutorial | ediblesoundbites.com

What I really love about it is that you can control how much sugar get's added to the whipped cream. I'm going to show you just how simple this is to make. So here we go.

1. Take a can of full-fat coconut milk and pop it in the refirgerator the night before making the coconut whipped cream. You must use full-fat coconut milk for the whipping process. Don't use light because the recipe won't turn out. Chilling the can of coconut milk causes the coconut cream to separate and solidify at the bottom, leaving the watery liquid at the top of the can.

2. Place your mixing bowl in the fridge for 5 to 10 minutes prior to whipping.

3. Remove the chilled can from the fridge and flip it. This way when you open the can, all the liquid will be at the top, making it easier to just pour it off to get to the coconut cream underneath.

Coconut Whipped Cream-1.jpg

4. Open the can and pour the coconut water into another bowl.Don't discard the water! Make sure you save it and add it to your next smoothie. It's pure gold!

Coconut Whipped Cream Photo Tutorial | ediblesoundbites.com

5.Scoop out the thickened coconut cream into your chilled mixing bowl. As you can see below, the coconut cream is hardened at the bottom of the flipped can.

Coconut Whipped Cream Photo Tutorial | ediblesoundbites.com

6. Whip the cream until it becomes fluffy and light. I used my stand mixer for this, but hand beaters or a whisk will also do the trick. Mix for 2-4 minutes. You will end up with small soft peaks.

Coconut Whipped Cream-9.jpg

7.Add vanilla and sugar, if using. At this point you can mix in 1/2 tsp - 1 tsp of vanilla extract or if you're feeling really fancy, the scraped out seeds from a vanilla bean. For sweetness you can add cane sugar, confectioner's/ powdered sugar or maple syrup; 1-3 tablespoons or to your desired taste. Beat until incorporated.

Now serve it up any way you like!!! Just in time for some fresh pumpkin pie. I also recommend trying it on fresh fruit and pancakes.

Coconut Whipped Cream Photo Tutorial | ediblesoundbites.com

To store:

The whipped cream will last up to 1 1/2 - 2 weeks in the refrigerator if stored in a sealed airtight container. It holds very well in the fridge, but if you're not going to use it immediately, you can re-whip it until it reaches the desired texture.

Coconut Whipped Cream

Coconut Whipped Cream Step-by-Step Photo Tutorial

by Jennifer Trennum

Prep Time: 5 minutes

Cook Time: 5 minutes

Keywords: how-to dessert dips, spreads frosting/ icing gluten-free grain-free low-carb low-sodium vegan vegetarian soy-free coconut maple syrup

6066772

Ingredients (1.5 cups)

  • 1 (14 ounce) can full-fat coconut milk, refrigerated for 24 hours
  • 1-3 tablespoons pure cane sugar, powdered sugar, or maple syrup (optional; add to taste)
  • 1 teaspoon vanilla extract

Instructions

Place your mixing bowl and beater in the freezer for 5-10 minutes to chill.

Remove the can of coconut milk from the refrigerator and flip it over so the label is upside down. Open the can and pour the coconut water into a dish or measuring jug to save for later. Remove the mixing bowl from the freezer. Using a spoon, scoop out the thickened coconut cream into your chilled bowl.

Using the whisk attachment for your stand mixer, or hand beaters, beat the coconut cream on medium speed for 2-4 minutes, or until the cream becomes light and fluffy and small peaks form. Add in your sweetener of choice and vanilla extract, and beat until incorporated.

Serve the coconut whipped cream, or transfer to a sealed airtight container and refrigerate. If you're not going to use the whipped cream immediately and it becomes too firm for your liking, you can re-whip it when ready to use to reach the desired consistency.

Notes

The whipped cream will last up to 1 1/2 - 2 weeks in the refrigerator stored in a sealed container.

Powered by

Recipage

I hope this was helpful and that everyone has a very happy Thanksgiving!!!