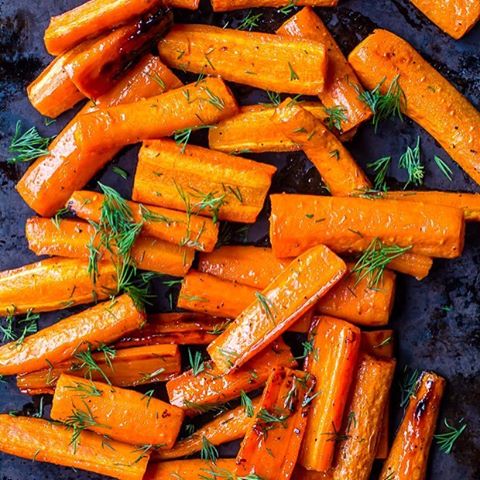
Honey Roasted Carrots
/There is never anything mundane about roasted root veggies.
Particularly when they're perfectly seasoned.

Carrots are one of my favourite vegetables to roast. They get all tender and caramelized and sticky sweet.
Everyone knows there's nothing worse that soft mushy carrots. These are quick, simple, and sure to be a hit with any picky eater.

This recipe is simple + so easy to whip up, requiring just 6 ingredients. It all comes together so quickly. Just 25 minutes from start to finish. That's it!
All you need is olive oil, honey, fresh dill, and good old salt + pepper. That's it. From there you can let these guys roast until perfection.

Crisp-tender goodness.

These roasted carrots are my new favourite!
They're:
- Savory + sweet
- Loaded with vitamin A and fibre
- Flavorful
- Insanely satisfying
- Easy
- And Quick
Make this recipe as a snack, a side dish for lunch or dinner, or alongside your favourite main dish. You really can't go wrong.

Honey Roasted Carrots
(serves 4-6)
Ingredients:
- 12 medium sized carrots, peeled (about 750 g)
- 2 tbsp olive oil
- 3 tbsp honey
- 1 tsp sea salt
- Freshly ground black pepper to taste
- 1-2 tbsp chopped fresh dill
Directions:
- Preheat oven to 400˚F. Lightly grease a baking sheet with non-stick cooking spray or cover with parcement paper.
- Slice the carrots in diagonally into 2-3 inch segments. If they are thick cut them in half lengthwise.
- Place carrots in a large bowl and add olive oil, honey, salt, and pepper to taste. Toss to coat.
- Spread in an even layer on the prepared baking sheet and roast in oven for 20 minutes, until lightly browned and tender.
- Serve immediately, garnished with dill, if desired.
Nutrition Facts
One serving (based on 6 servings): 119 calories, 5 grams of fat, 21 grams of carbs, 1 grams of protein